When the interior and exterior of your new construction home have been completed, you’re one step closer to moving in. But before you officially take ownership, there’s one more essential step in the new home construction process: a comprehensive final home walkthrough.
This walkthrough is your chance to thoroughly inspect your new home and ensure everything has been completed to the highest standards and matches what you agreed upon. Our final home walkthrough checklist will guide you through key areas to examine — from finishes and appliances to plumbing and electrical systems — to help you catch any issues before closing. Carefully taking the time to do this protects your investment and sets the stage for a smooth, confident move-in.
Here’s a handy guide covering the key areas to inspect before closing on your new home, helping you stay organized and make the most of your final walkthrough.
What Gets Checked During a Final Home Walkthrough
During the walkthrough, the builder and buyer have roles when inspecting the property. The builder is responsible for walking the buyer through the home, explaining key systems and features, and confirming that all agreed-upon work is complete and satisfactory. Meanwhile, the buyer should carefully review the home’s condition, look for cosmetic or functional issues, and ensure everything matches the contract before closing. As you walk through the home, you will see several key areas that will be covered.
1. Appliances and Fixtures
All installed appliances, lighting, plumbing fixtures, and hardware will be demonstrated to confirm proper installation and functionality. This includes testing operations and ensuring that finishes and materials align with what was selected during the build.
2. Electrical, Plumbing, and HVAC Systems
Although these systems were previously inspected during the mid-construction phase, they are reviewed again during the final home walkthrough to ensure everything is fully operational and properly installed. This includes verifying that outlets and light switches function properly, plumbing fixtures have the correct water pressure and temperature, and that the heating and cooling systems operate smoothly. The builder may also point out key components, such as the circuit breaker panel, water shut-off valve, and air filter access.
3. Windows, Doors, and Garage
Each window and door will be opened and closed to confirm smooth operation, correct alignment, and secure locking. Garage doors, including remotes and wall panels, are also tested during this stage.
4. Exterior and Landscaping
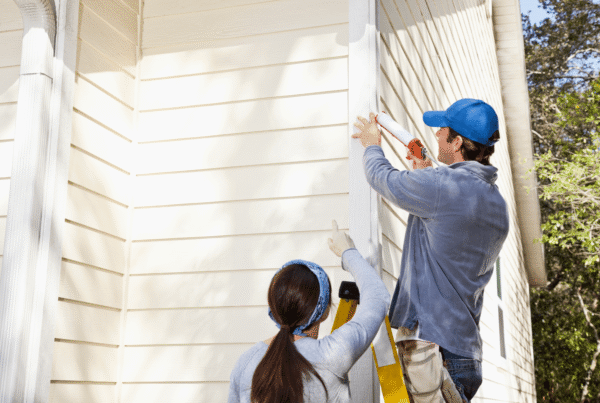
The home’s exterior, including siding, paint, roof, gutters, and hardscape elements, is reviewed for completion and quality. Landscaping and drainage are also assessed to ensure community or lot plan compliance.
5. Builder Punch List
Any outstanding or incomplete items are added to the builder’s punch list during the final home walkthrough. This may include cosmetic touch-ups, minor repairs, or items delayed during construction. The punch list serves as a formal record of what still needs to be addressed, and the builder will provide a timeline for completing those items, either before closing or shortly afterward, depending on the agreement.
Here is a sample punch list to give you an idea of what might appear in this document:
Sample Punch List
- Lights, outlets, and switches work
- HVAC, plumbing, and water heater functioning
- Appliances installed and operational
- Walls and floors are free of damage or defects
- Doors and windows open, close, and lock properly
- Cabinets, countertops, and fixtures are installed correctly
Homeowner Responsibilities
Understanding what to look for during a final home walkthrough helps you remain confident and informed throughout the process as the homeowner. While the builder leads the walkthrough, the homeowner also plays an important role. This is your opportunity to get familiar with your new home, ask questions, and ensure everything aligns with your expectations and contract details.
Here’s how you can make the most of it.
Review the Builder’s Materials
Before the final home walkthrough, come prepared by reviewing your contract, selection sheets, and any upgrade documents. These materials serve as your reference point for what should be present and what should be completed in the home. Knowing what to expect makes it easier to identify discrepancies and ensure the home reflects your agreed-upon choices.
Document Everything
Take notes and photos of anything you notice during the walkthrough, whether it’s a cosmetic issue, a missing feature, or something that looks incomplete. Even small details should be recorded and added to the punch list. Clear documentation helps avoid misunderstandings and ensures any necessary follow-up is based on agreed-upon observations.
Ask Questions
This is the perfect time to ask your builder about home systems, maintenance tips, warranty coverage, or any other questions you may have. Don’t hesitate to speak up. Your builder expects questions and is there to help you feel confident about your new home.
Ready for Move-in?
The final home walkthrough is crucial to ensure your new home is ready for move-in. You can move forward with confidence and excitement by carefully reviewing all aspects of the property and addressing any outstanding items with your builder.
At Brock Built, we’re committed to making this process smooth and transparent. Our team works closely with homeowners during the final walkthrough to ensure every detail meets our high standards and your expectations. Contact us today to learn more about our home building process and how we can help you find the perfect new home.
FAQs
What is a final home walkthrough?
When purchasing a home, a final home walkthrough is the buyer’s last chance to inspect the property before closing. The goal is to confirm that the home is in the agreed-upon condition, that all negotiated repairs have been completed, and that nothing has been damaged or removed that shouldn’t have been. The final home walkthrough is not the time to request new repairs, but it is a crucial step to ensure there are no surprises after you take ownership.
What to look for in a final home walkthrough?
During a final home walkthrough, buyers should carefully inspect the property to ensure everything is in the agreed-upon condition. This includes verifying that all requested repairs have been completed, appliances and fixtures are functioning correctly, and that there is no new damage to the home. Check that plumbing, electrical outlets, light switches, heating, and air conditioning systems are all working. Look for signs of water damage, mold, or pest issues, and make sure doors and windows open, close, and lock correctly. Also, confirm that any items included in the sale, such as appliances, light fixtures, or window treatments, are still present.
Can you skip the final home walkthrough?
While not required, it is highly recommended not to skip the final home walkthrough. Even if the home appeared perfect during your last visit, things can change quickly, especially during move-in. A final walkthrough lets you confirm everything is still in order before signing the closing documents. Skipping it could result in discovering problems too late, like missing appliances, uncompleted repairs, or new damage, that you may have to fix at your own expense.